Your Coil Is Probably the Problem: A No-Nonsense Guide to Better Hits and Fewer Wasted Bucks
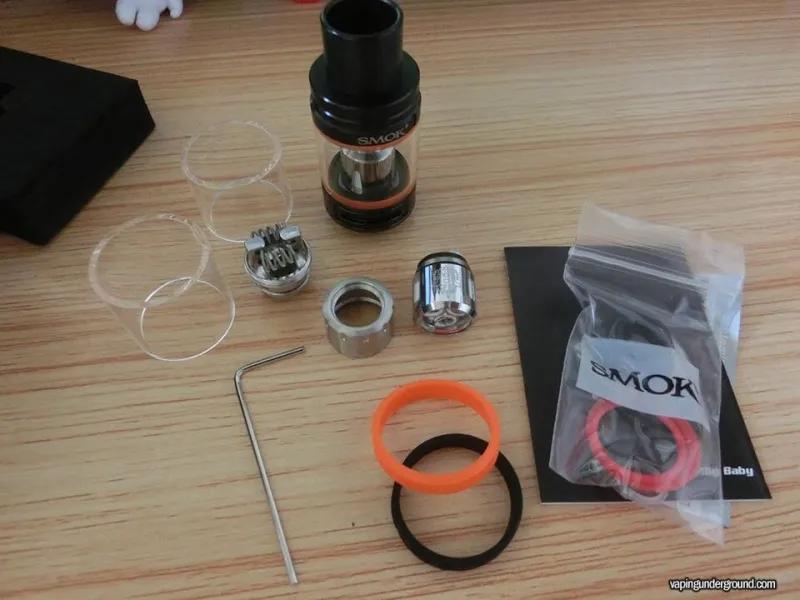
Photo: Skybbc, CC BY-SA 4.0, via Wikimedia Commons
You bought decent juice. You've got a solid device. But every few hits you're getting something that tastes like burnt popcorn left in a microwave, or a weak, watery draw that barely registers. Frustrating, right?
Before you go down a rabbit hole blaming your e-liquid or convincing yourself you need a whole new setup, stop and check your coil. Seriously. Coil issues are responsible for the overwhelming majority of vaping complaints, and understanding how they work — and when they fail — will save you real money and a lot of headaches.
What a Coil Actually Does
At its most basic, a vape coil is a small piece of resistance wire wrapped around a wicking material (usually cotton). When you fire your device, electricity passes through that wire, it heats up, and the cotton — which is saturated with e-liquid — vaporizes the juice into the aerosol you inhale.
Simple in theory. But there are a few variables that determine whether that process produces a satisfying hit or something that makes you want to throw your device across the room.
Resistance Ratings: The Numbers on Your Coil Actually Mean Something
Flip your replacement coil pack over and you'll see a number followed by the Greek letter omega (Ω) — that's the coil's resistance rating, measured in ohms. This number tells you how the coil responds to power and, importantly, what kind of vaping experience it's designed to deliver.
Higher resistance coils (1.0Ω and above) run at lower wattages. They produce less vapor, use less battery, and are generally better suited for a tighter, more cigarette-like draw — sometimes called mouth-to-lung (MTL) vaping. If you're a newer vaper coming from cigarettes, this is probably your zone.
Lower resistance coils (below 1.0Ω, often called sub-ohm) require more power to run properly. They produce bigger clouds, more intense flavor, and a warmer, airier hit. This is the territory of direct-lung (DL) vaping — inhaling straight into your lungs rather than holding vapor in your mouth first.
Using the wrong resistance coil for your device, or ignoring the recommended wattage range printed on the coil itself, is one of the single most common reasons people have a bad time.
The Wattage Matching Problem (And Why It Wrecks Flavor)
Every coil has a recommended wattage range — something like "25–40W" printed right on the packaging. That range exists for a reason.
Too low: The coil doesn't get hot enough to properly vaporize the liquid. You get a thin, flavorless hit and your wick stays oversaturated, which can lead to leaking and gurgling.
Too high: The coil overheats. The cotton scorches before it can re-saturate between puffs, and you get that unmistakable burnt taste. Once cotton is charred, no amount of re-priming will fix it — that coil is done.
Start in the middle of the recommended range and adjust from there based on how the vapor feels. Warmer and more intense? Drop a couple watts. Weak and barely there? Nudge it up. Small adjustments make a bigger difference than you'd expect.
How to Tell When a Coil Is Done
Coils don't last forever, and knowing when to replace one versus troubleshooting it can save you from chasing a problem that has a five-dollar solution.
The burnt taste that won't quit. If you've re-primed, adjusted your wattage, and the scorched flavor persists, the cotton is gone. Replace the coil.
Dramatically reduced vapor production. If your setup used to produce satisfying clouds and now it's giving you a thin wisp, the coil's heating element may be degrading. Coil wire does wear out.
Persistent gurgling or flooding. Sometimes this is a priming issue, but if it keeps happening across multiple fill cycles, the coil's wicking ports may be gummed up with residue — especially if you use heavily sweetened e-liquids (more on that in a second).
Dark, gunky residue in the tank. If you hold your tank up to the light and see dark brown buildup around the coil, that's caramelized sweetener from your juice. It's killing your coil faster than normal use would.
For most vapers using their device daily, a coil lasts anywhere from one to three weeks. Heavy users or people who love sweet dessert flavors will burn through them faster.
The Sweetener Problem Nobody Talks About Enough
This deserves its own callout: sucralose, the sweetener used in a huge percentage of popular e-liquids, is brutal on coils. It caramelizes when heated and builds up on the cotton and wire faster than almost anything else. If you're going through coils every few days and you're vaping a candy or dessert flavor, that's almost certainly why.
Switching to lower-sweetener or "coil-friendly" e-liquids can extend coil life dramatically. Some juice brands specifically market this — it's worth experimenting with if coil costs are adding up.
Priming Your Coil: The Step Most People Skip
Installing a new coil and immediately firing at full wattage is the fastest way to burn out a brand new coil before it's even had a chance to work. Priming — allowing the cotton to fully saturate with e-liquid before your first hit — is essential.
Here's the quick version:
- Install the new coil and fill your tank.
- Let it sit for at least five minutes (ten is better).
- Take a few slow, unpowered draws to pull liquid into the wick.
- Start at the low end of the recommended wattage range and work up gradually over your first few hits.
This one habit alone will noticeably extend how long your coils last.
When It's Not the Coil
Occasionally the issue really is something else — a cracked tank, a device with a firing button that's sticking, or an e-liquid that's gone off. But in our experience, if you've ruled out a priming problem and you're within the correct wattage range for your coil, and you're still getting bad hits, swapping in a fresh coil is the fastest, cheapest diagnostic tool available.
A pack of replacement coils runs anywhere from $10 to $20 for a five-pack. That's a much cheaper experiment than buying a new tank or a different device.
Understanding your coil is one of those things that feels technical until suddenly it clicks — and once it does, you'll stop wasting money on guesswork and start actually enjoying your setup.